
When I started out, I had no idea that making soap would be so easy, or so fun. Plus, it’s been almost six months and I still have about fifteen bars of my home-made, goat’s milk oatmeal soap to use or give away. There’s still a shopping bag half-full in my cabinet, and whenever someone comes over, I pawn a few bars off on them.
Making soap is a lot of fun, but it can also be dangerous. The reason 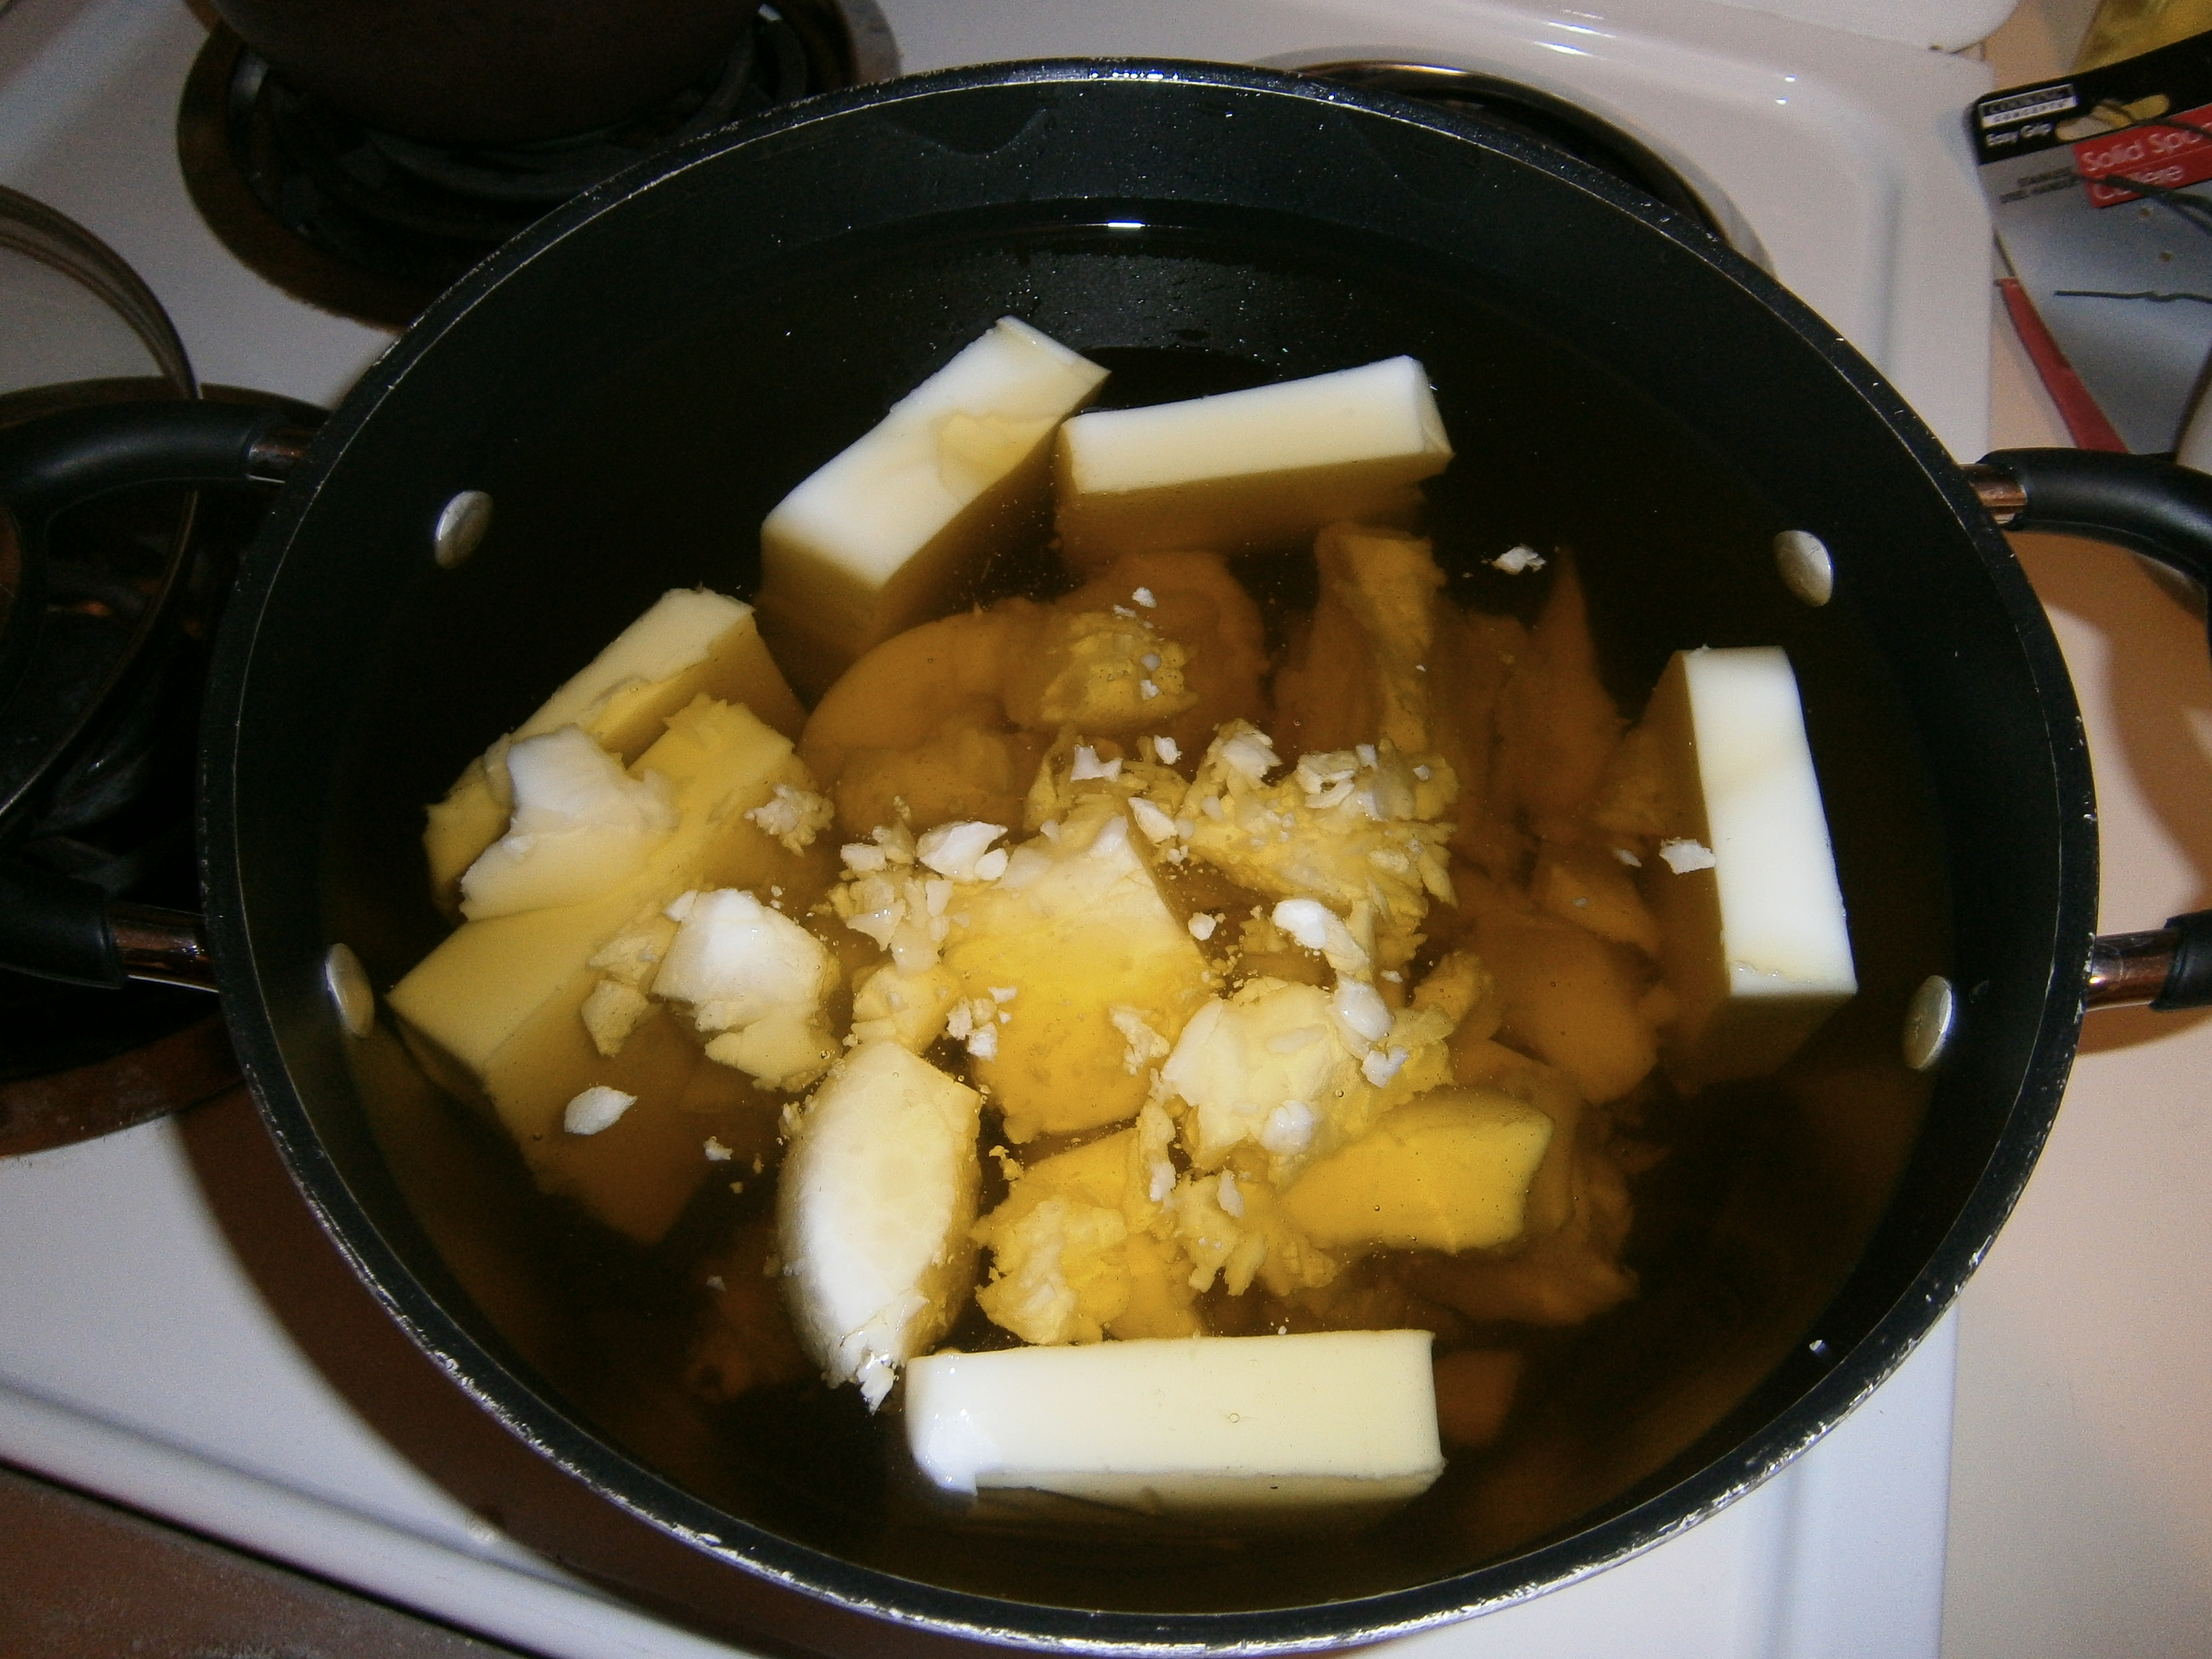 soap is soap is that it has lye in it. Lye is a poisonous chemical that can burn your eyes, irritate skin, and even kill if it’s ingested. If you have pets or young children, I would recommend that you make your soap outside. Also, don’t use your favorite spoon or kitchen scale for the lye, as the tools used to handle the lye should not be used for food.
The total cost for ingredients was less than $40.00 and for that I got fifty-one bars of soap. Not too bad, as this is far more soap than I could use in a year! Everyone I’ve given it to enjoys that nutty oatmeal aroma and scrubbiness of the whole oats. With the goats milk and ground oats it creates a medium lather but doesn’t leave my skin dry. Its’ nice color, texture and aroma make it a pleasure to use for showers or for hand soap at the kitchen sink.
I first started out by picking up supplies and ingredients. I bought a little coffee grinder, some cheap trays to use as forms, buckets, gloves, a thermometer and a kitchen scale. I also bought lye, goat’s milk, lard, olive oil, and coconut oil. I had oats and vinegar at the house already. I put the goat’s milk in the freezer to let it get a little slushy, but that will be explained later.
The first step is to warm all the oils together so that they mix and pour easily. The lard and coconut oil melted quickly and I left them on the stove on low with the olive oil mixed in so that the whole mixture would stay liquefied. I then threw a cup of whole oats into the mix and also a cup of finely ground oats as well.
Step number two is to mix the goat’s milk and lye. When lye is mixed with liquids of any sort, there is a chemical reaction that occurs that makes the mixture very hot. If the lye is added too quickly, it can react so fast that there may be a small explosion of lye and milk. It is definitely best to err on the side of caution when mixing these ingredients. This is the reason that the goat’s milk should be slushy. It will tamper down the veracity of the chemical reaction, while also helping to get the mixture back down to a working temperature more quickly.
Pour the slushy goat’s milk into a pail. Slowly add the lye to the goat’s milk, stirring as you go. Only add small amounts of lye at a time. This is best done outside. However, if it’s a really windy day, you should probably seek the shelter of a garage or shed. When all of the lye is added to the milk, it will be turning into a bright yellow puddle in the pail. 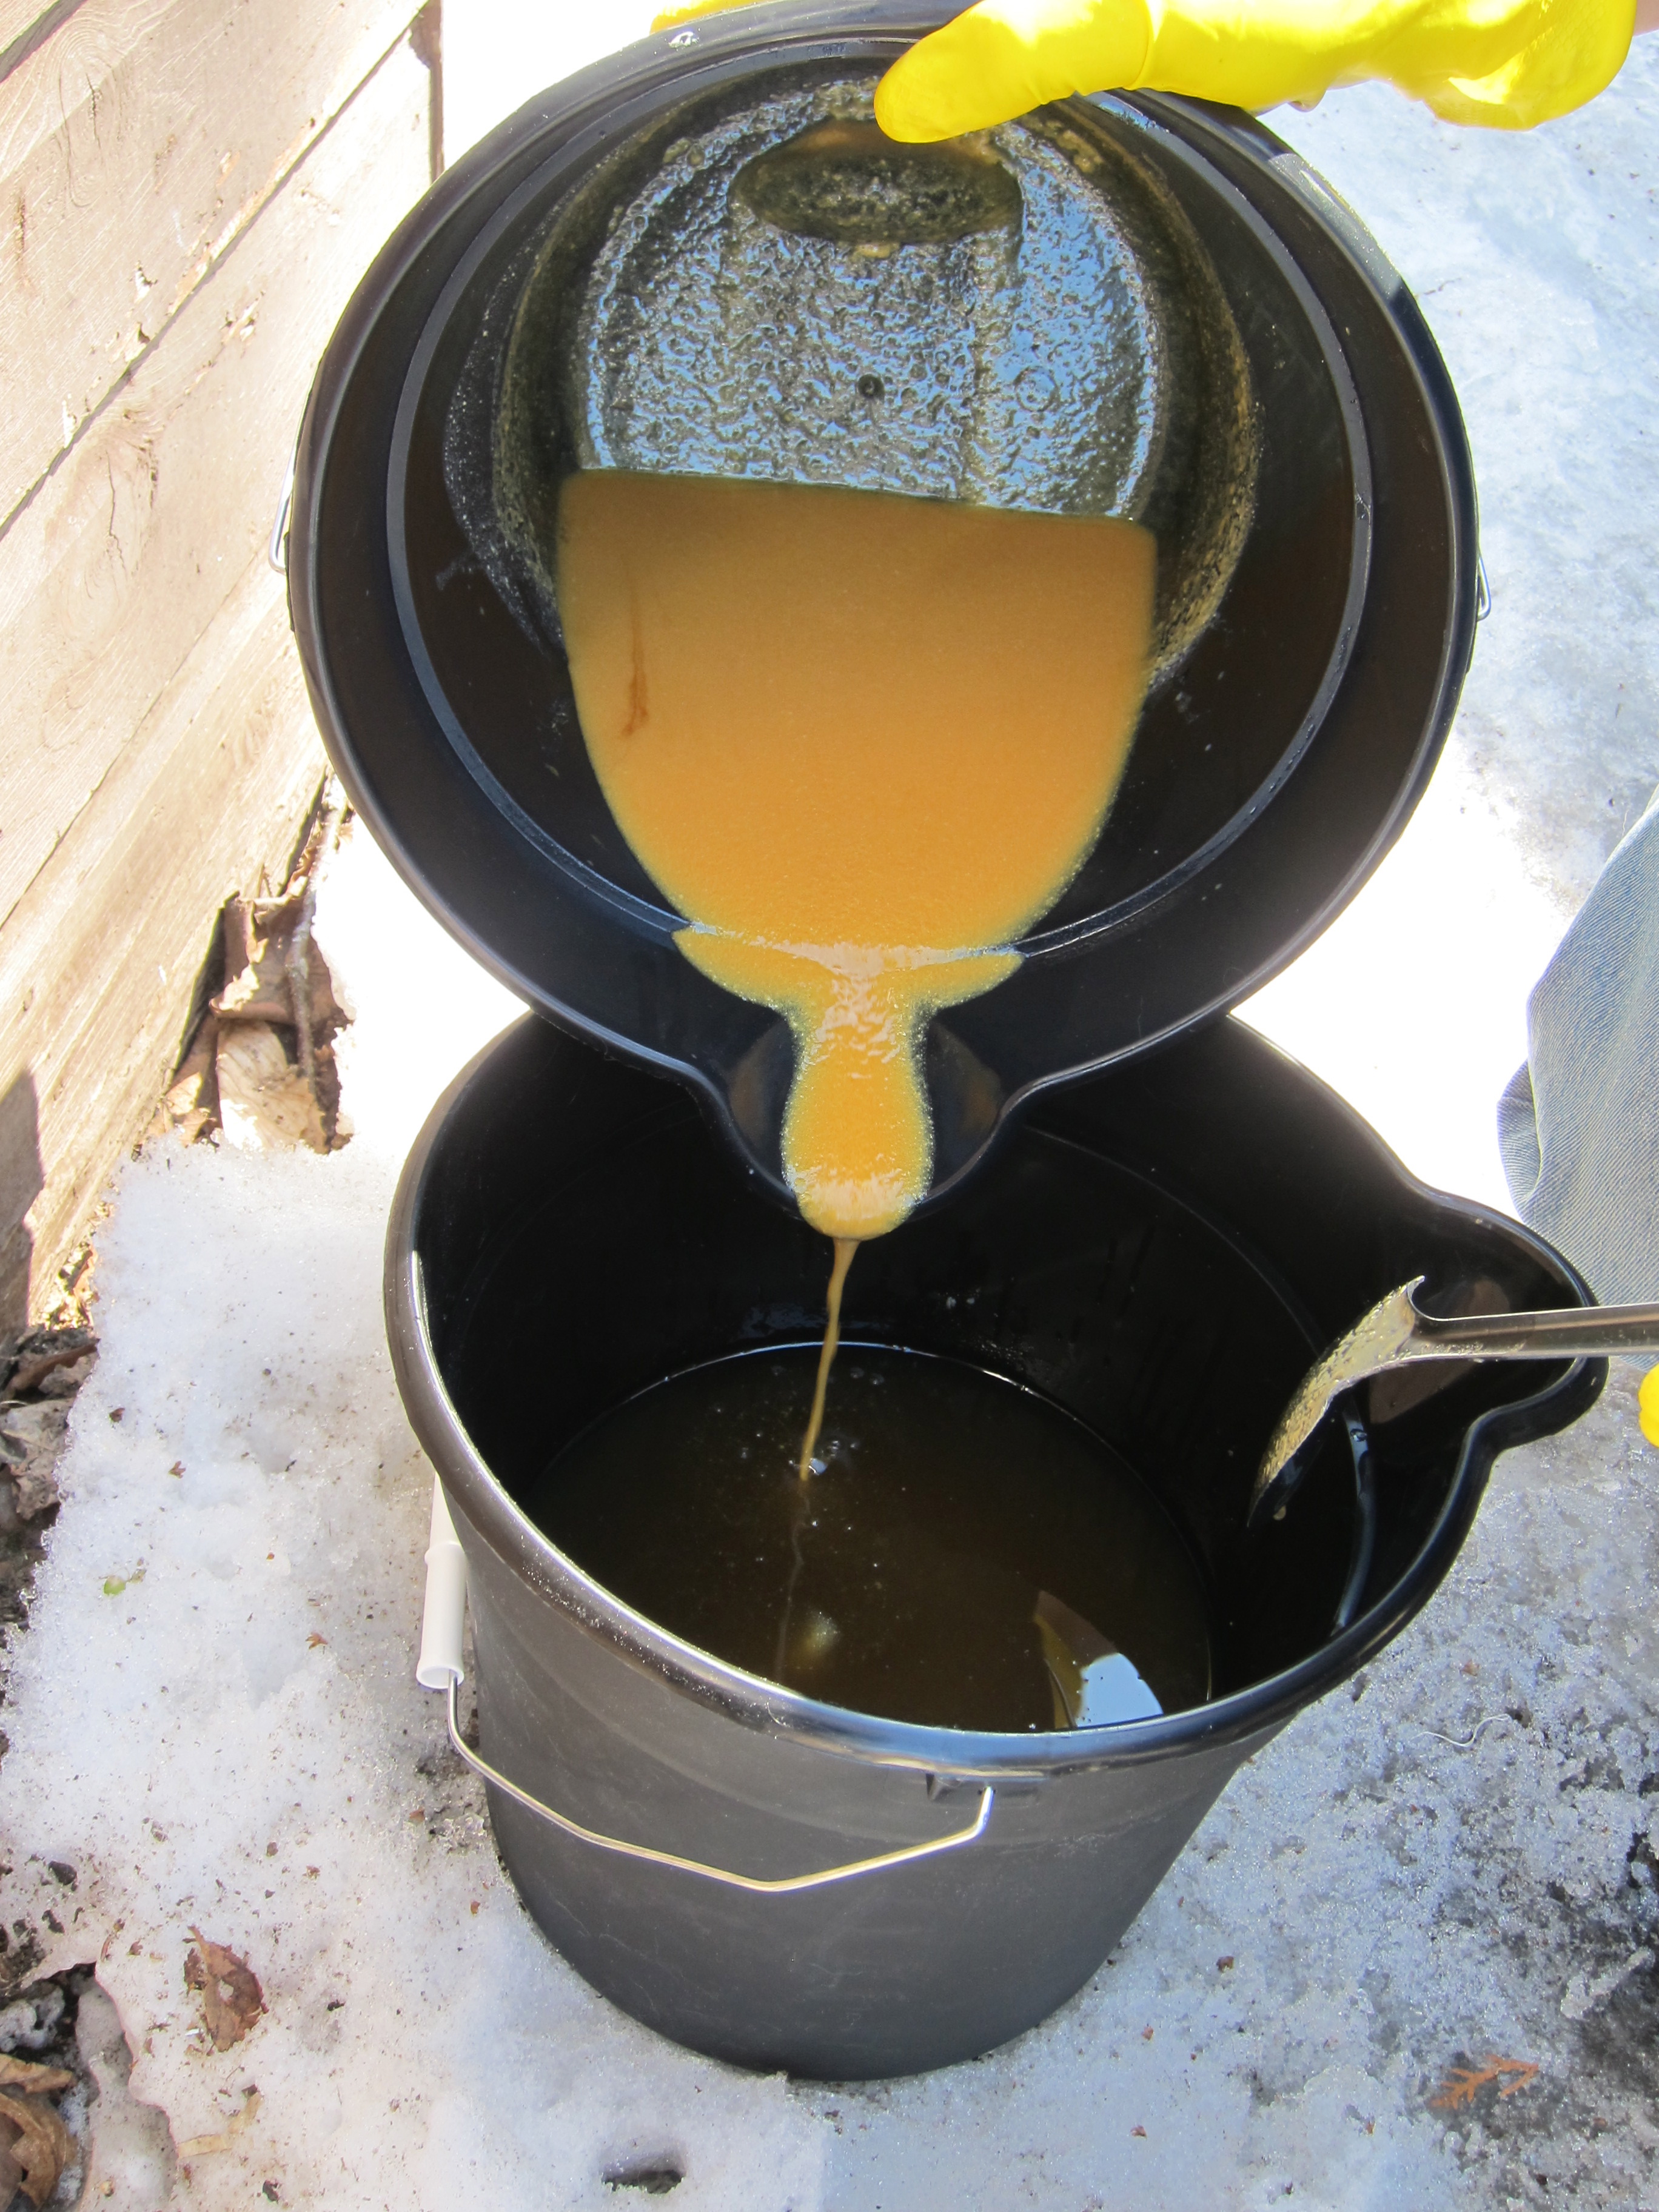 This is the heat from the reaction caramelizing the sugars in the milk. Don’t worry, this will not be the color of the final product.
Then let the mixture cool down to about 100 degrees Fahrenheit. I made my batch in March in Upstate New York, so the cooling process did not take very long. I did everything inside except measuring and mixing the lye. The pail of goat’s milk and lye cooled down in about a little under an hour, but if it had been summer or in a heated basement or garage, it would have taken much longer.
Next, take another pail and add the liquefied oil and oats mixture, then start slowly adding the milk and lye mix. Then sit back, relax, and start stirring. Now what you’ll be waiting for is the “tracing” to occur. This is when the mixture has hardened to the point where when you drag you spoon through it, the line left behind by the spoon lingers for a few seconds. It is still a pourable liquid, but on its way to becoming almost pudding-like in consistency. This could take some time, but my batch started to trace within forty-five minutes. At this point, the liquid soap was far less yellow than it had been and was starting to look more oatmeal-like in its appearance.
When the trace started to occur, I really reached down into the depths of the pail with my large spoon just to make sure I had a good mixture. Then I took out the cheap pans and recycled yogurt containers and started to spoon the soap into them. I had two six-by-six baking pans that I added the soap to along with some small plastic containers. The soap could be poured directly into the larger pans, but needed to be spooned into the smaller containers to avoid spillage.
I let the whole magellah sit overnight to harden a little bit and the next afternoon I popped the mostly dried soap onto an old pizza box and started to cut it all into bars. With the yogurt and plastic containers I was able to just pop out the preformed bars, and even get a nice little design from the yogurt containers, kind of a Union Jack pattern. The baking pans needed to be cut into bars though, and I found that a wet knife made the cutting a lot easier. It also made the edges smoother and caused far fewer chips to break off. Although, I kind of like the home-made rustic appearance of the bars of soap with rough edges.
The last step is the hardest of all. Sitting there and letting your new batch of soap cure for a month or more. I left mine for five weeks just to make sure it was good and done. The chemical reaction we started by adding the lye to the milk doesn’t finish right away, and because of this it is important to let the soap cure properly. Keep it in well ventilated area at room temperature. I kept mine in a pizza box lined with wax paper to protect the soap and to keep my cats form licking or eating it. This method also conveniently kept the finished product pet hair free.
All in all, I have had a great time making soap, and several of my friends 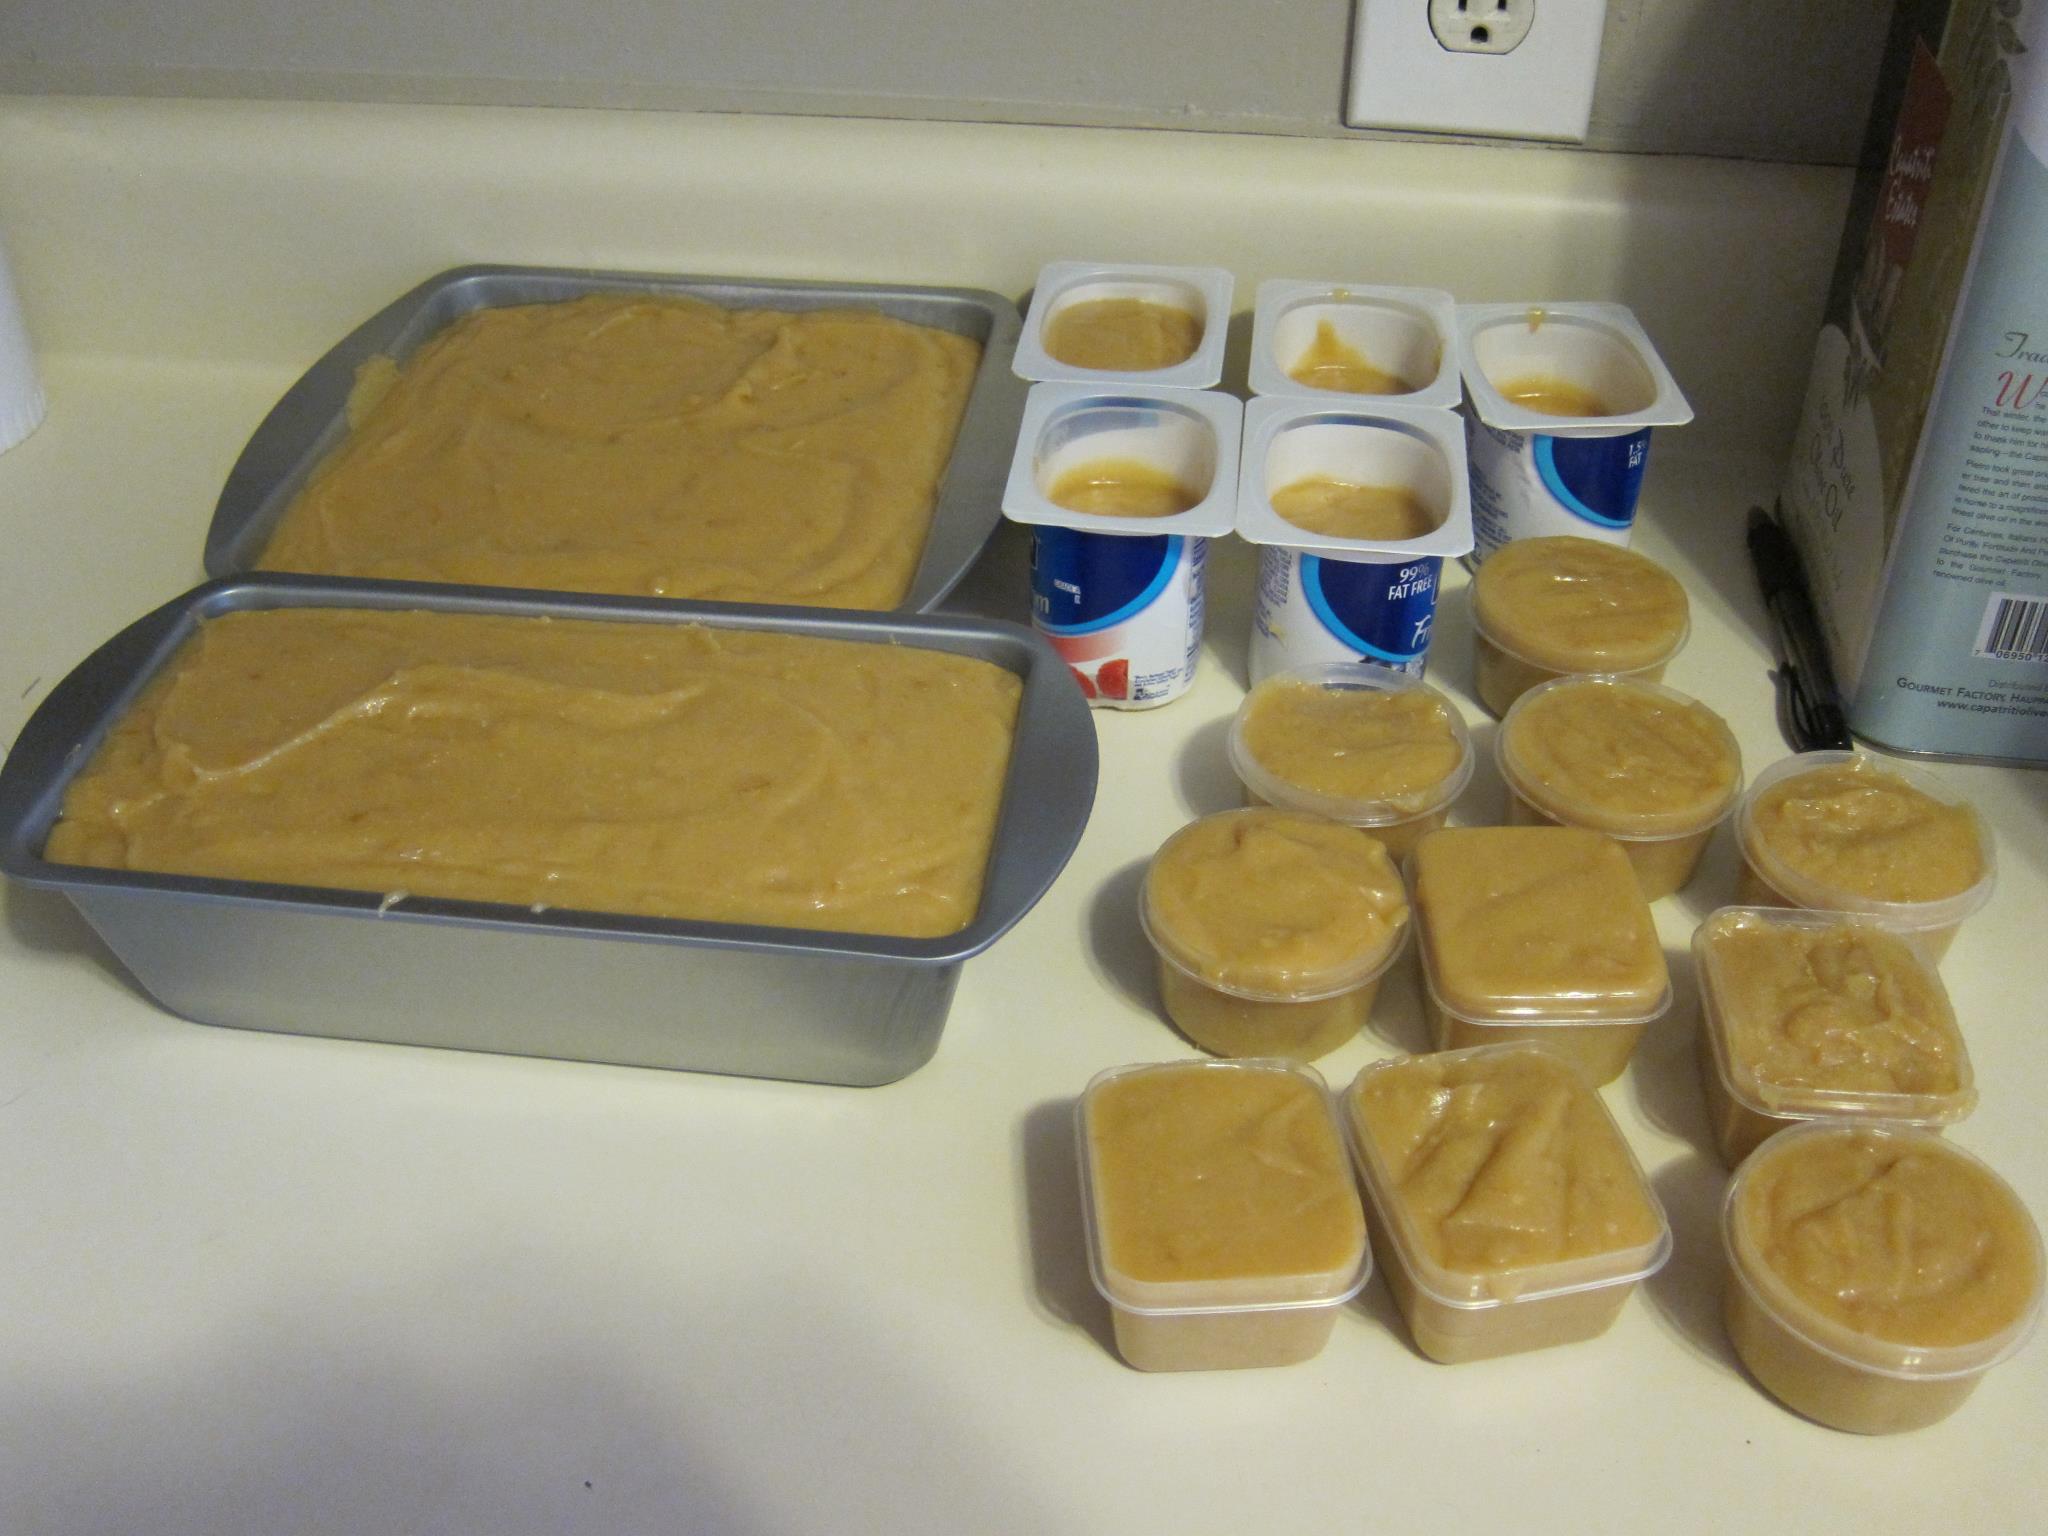 and family are now set up with a few months supply of soap. In hindsight, I cut some of the bars a little small, but for less than a dollar per bar, I have no qualms about burning through the little bars. Plus it’s nice to know for quite some time, I won’t have soap on my shopping list.
Be sure to like Middle of the Trail on Facebook for more pictures and daily updates and follow @JustinALevine for whatever it is I do on Twitter.